
Why Some Lash Sets Look “Too Much” (And How to Keep Them Beautifully Natural)
You've just finished a full set. Up close, the isolation looks clean. The curls are consistent. But when your client sits up and checks the mirror, something's off. The lashes look heavy. Clumpy. Obviously fake.
This is the most common struggle for new lash techs, and it's not because you're failing. Natural results don't come from more practice alone. They come from specific product and technique choices that most training courses gloss over. This article diagnoses the exact visual problems clients see and gives you immediate fixes you can apply on your next appointment.
The Tell-Tale Signs Your Lash Sets Look Fake

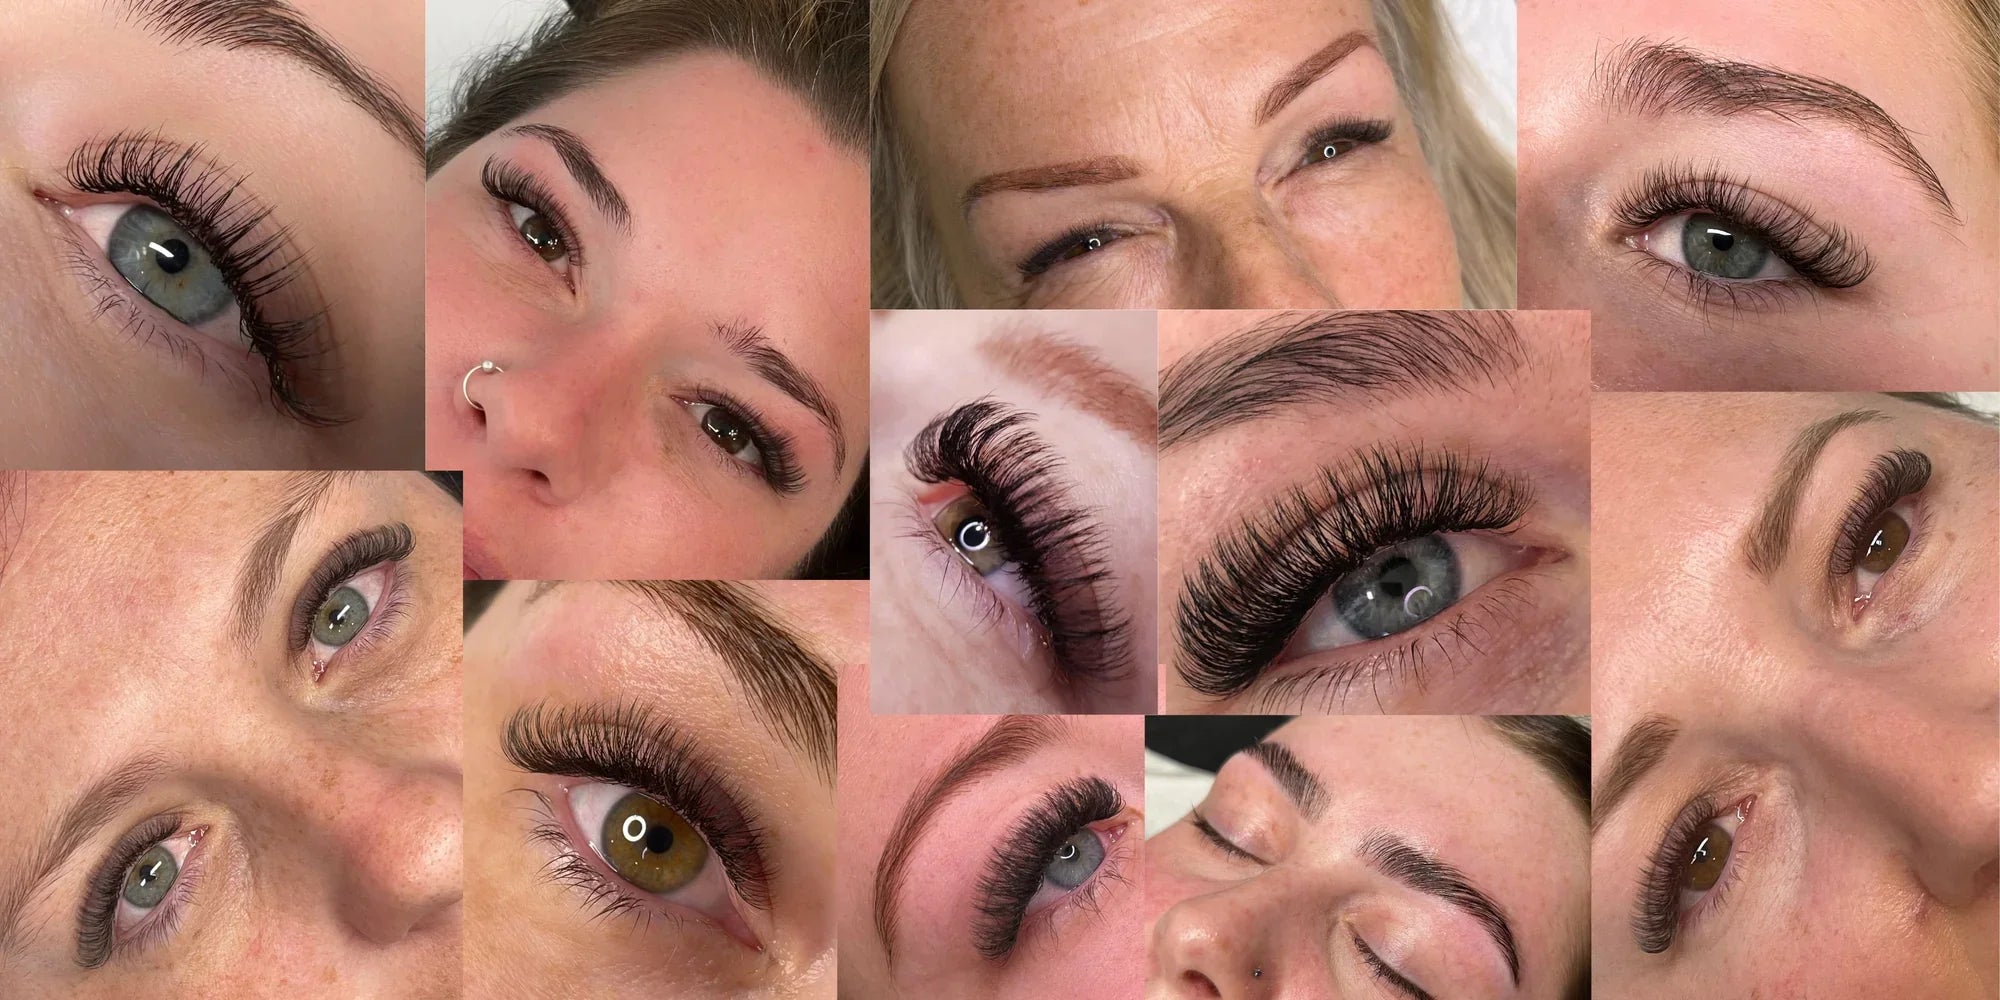
Before you can fix unnatural lashes, you need to recognise what clients actually see in the mirror. These are the visual red flags that make extensions look obviously fake, even to someone who's never had lashes done before. Identifying these signs is the first step to fixing them. And here's the reassuring part: these are fixable problems, not permanent flaws in your work.
Clumpy, spidery lashes that stick together
This is what clients notice first. Instead of individual fans, the lashes form triangular clumps or 'spider legs' where two or three extensions stick together. It's visible even from across the room. The clumping usually happens at the base where the extensions meet the natural lashes, creating a thick, unnatural ridge. Clients describe it as looking 'heavy' or 'fake', and they're not wrong.
Visible gaps or bald patches in the lash line
Gaps create an uneven, patchy appearance that draws attention to what's missing rather than what's there. This is especially noticeable when clients look down or close their eyes. Sometimes gaps appear immediately after application. Other times they develop within a few days. Either way, the result is the same: an incomplete lash line that looks obviously enhanced rather than naturally full. And it's not always about missing natural lashes. Often, it's about placement.
Extensions that point in different directions
When extensions angle outward, inward, or cross over each other, the result is chaotic. Real lashes follow a natural sweep pattern. When extensions break that pattern, the eye immediately registers something wrong. This is most obvious on the outer corners where direction matters most. One extension pointing up, another pointing out, a third crossing inward. It's the opposite of the seamless, uniform look clients expect.
Why This Keeps Happening (Even When You Follow the Rules)

You're isolating. You're using good products. You're following the steps your trainer taught you. But the results still look off. Here's the problem: following the rules isn't enough. Natural results come from matching products and technique to each individual natural lash, not applying a one-size-fits-all approach. Training often oversimplifies this process, which is why these mistakes happen even when you think you're doing everything right. For more insights on common lash myths and techniques, check out our Articles section.
You're using too much adhesive or applying it wrong
Excess adhesive is the direct cause of those clumpy, stuck-together lashes. When there's too much adhesive on the extension, it doesn't just bond to the natural lash. It spreads, creeps up the extension shaft, and catches neighbouring lashes before it dries. What does 'too much' look like? Visible beads at the base. Adhesive creeping up the extension. Slow drying times that force you to hold the extension in place longer than you should.
The main culprit is dipping directly into the adhesive without control. You dip, you apply, and you've just transferred far more adhesive than you need. The challenge isn't knowing you should use less. It's knowing exactly how much 'less' actually is.
Your curl and length choices don't match the natural lash
Using the same curl on every lash creates unnatural angles and gaps. If you're reaching for a C-curl by default, you're creating problems. A C-curl on a naturally straight lash can cause the extension to stick out at an odd angle. A C-curl on a lash that already has lift can create too much curve, making the extension point upward instead of forward.
Length mismatches cause extensions to droop, cross, or stick out awkwardly. Picture this: you place a 12mm extension on a short, straight natural lash. The weight pulls the natural lash down. The extension droops. The result looks heavy and unnatural. It's not about complex curl theory. It's about recognising the mismatch before you apply the extension.
You're rushing the isolation step
Incomplete isolation is the direct cause of lashes sticking together and pointing in the wrong direction. Rushed isolation looks like this: you separate a lash with your isolation tweezer, pick up an extension, and place it without confirming the natural lash is fully separated. You're moving fast because you feel pressure to finish the set quickly.
But here's what happens: the lash wasn't fully isolated. A neighbouring lash was touching it. Now the adhesive has bonded both lashes to the extension. You've created a sticky. The lashes will pull on each other, point in different directions, and fall out prematurely. This isn't about working slowly. It's about missing a critical verification step.
The Fixes That Actually Work

Now that you know the causes, here are the specific technique changes that solve each problem. These are immediate, actionable adjustments you can try on your next client. They're not advanced tricks. They're refinements to steps you're already doing. Small changes to product handling and placement create dramatic improvements. If you're looking for expert guidance on refining your technique, contact Exotiquelashes for professional support.
The 'dip and wipe' method for adhesive control
Here's the exact technique: dip the extension base 1-2mm into the adhesive, then gently wipe it on the edge of your adhesive well or palette. This removes excess while leaving a thin, controlled coating. The adhesive should look like a slight sheen on the extension base, not a visible bead. If you can see the adhesive, there's too much.
What to avoid: dipping repeatedly or applying adhesive directly from the nozzle. Both methods give you zero control over the amount. One dip, one wipe, one application. That's it.
Mapping curls to match natural lash angles
The rule is simple: if the natural lash points down, use a stronger curl. If it's already lifted, use a gentler curl. A C-curl works for straight lashes that need lift. A B-curl works for lashes that already have natural curve. Before you pick up an extension, look at the natural lash from the side. Is it pointing down? Straight out? Already curving upward? Match the curl to what you see.
This isn't about memorising curl charts. It's about observing and matching. The natural lash tells you what it needs. You just need to look. For more on achieving natural-looking results, read about The Wet Look What Is It technique.
The two-tweezer isolation check before every extension
After you isolate a lash with one tweezer, use the other to gently test if the lash moves independently. Tap it lightly. Does it move on its own, or do neighbouring lashes move too? If neighbouring lashes move, isolation isn't complete. Re-isolate before applying the extension.
This is a three-second check that prevents hours of clumpy results. It stops stickies before they happen. It ensures extensions point in the right direction. It prevents premature fallout. Three seconds per lash. That's the difference between a natural set and a fake-looking one. You might also find it helpful to understand common misconceptions by reading Dont Get Them Wet The Trainer Said Fact Or Fiction.
When Your Sets Will Start Looking Natural

These fixes work immediately, but mastering them takes deliberate practice over 5-10 clients. Natural results come from intentional product choices and verification steps, not just speed or experience. If you implement even one fix, especially adhesive control or the isolation check, you'll see improvement on your next client.
Unnatural-looking sets aren't a talent issue. They're a technique refinement issue, and they're completely fixable. The difference between fake-looking lashes and natural ones isn't years of experience. It's knowing exactly where the problems come from and having the specific techniques to solve them. You already have the foundation. Now you have the refinements that make the difference.
If you need expert help refining your technique or want personalised guidance, reach out to Exotiquelashes for professional training and support tailored to your needs.

Leave a comment
This site is protected by hCaptcha and the hCaptcha Privacy Policy and Terms of Service apply.