
Article: Why Your Lash Application Technique Matters More Than Your Product Choice
Why Your Lash Application Technique Matters More Than Your Product Choice
You can hand someone a $400 lash kit and watch them damage their client's natural lashes. Then you can hand an experienced technician a basic $80 setup and watch them deliver flawless retention with zero damage. The difference isn't the products. It's what the hands holding them actually know how to do.
If you're a lash student convinced that buying premium adhesive or expensive tweezers will solve your application problems, this will save you money and frustration. The truth is simpler and harder: your technique determines your results. Everything else just supports it.
This isn't about dismissing quality products. It's about understanding that they can't fix poor isolation, incorrect extension weight, or shaky hands. Let's break down what actually matters when you're working on a client, and how to build the skills that make any reasonable product perform well.
The expensive lash kit that didn't save your client's natural lashes

A student spends $450 on a premium lash kit. Top-shelf adhesive. Japanese tweezers. Extensions from a brand every experienced tech raves about. She's certain this is the missing piece. The kit arrives, she works through her next three clients, and the results are the same: patchy retention at two weeks, complaints about discomfort, natural lashes that look thinner than before.
The disappointment hits hard. If expensive products don't work, what will?
Here's what actually happened: the products were fine. The application wasn't. She was still isolating poorly, picking up too much adhesive, and placing extensions too close to the lash line. Premium tools can't correct for hands that haven't learned control yet. This isn't a character flaw. It's a training gap that most students face, and the industry doesn't always make it clear that skill development takes longer than a weekend course.
What actually causes lash damage (and why your adhesive brand isn't on the list)
When clients experience damage or poor retention, students blame their products first. Wrong adhesive. Wrong extensions. Wrong remover. But the real culprits are technical errors that happen during application, regardless of what brand name is on the bottle.
Three mistakes cause most of the problems you'll see: poor isolation, incorrect extension weight, and sloppy adhesive placement. Fix these, and suddenly your current products work significantly better. For more foundational guidance on lash application principles, our Articles section covers the technical basics worth revisiting regularly.
Poor isolation technique
When you don't isolate properly, multiple natural lashes stick together. As those lashes grow at different rates, they pull on each other. The result: breakage, discomfort, and clients who won't come back.
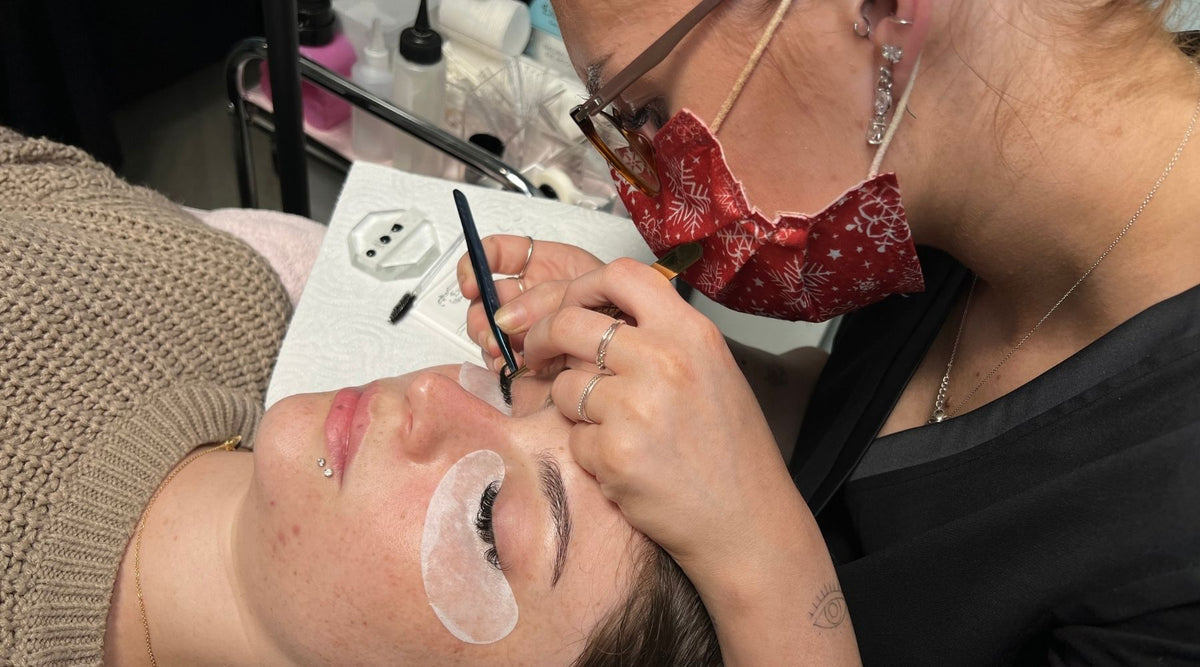
Proper isolation means each extension attaches to exactly one natural lash, with no neighbouring lashes touching the adhesive. Check your work by gently brushing through completed lashes. If any stick together or pull when you brush, your isolation failed.
The test is simple. If you can't see clear separation between every single lash, you're creating problems that no premium adhesive will solve.
Incorrect extension weight for natural lash diameter
Thin natural lashes can't support heavy extensions. Put a thick extension on a fine natural lash and it droops immediately, then falls out early. It's like hanging a heavy frame on a weak nail.
If you're seeing natural lashes pointing downward under extension weight, you've chosen too heavy. Start with 0.15mm or 0.12mm extensions until you can properly assess natural lash strength. Thicker looks impressive in photos, but not when the client's natural lashes are damaged two weeks later.
Adhesive placement and pickup amount
Two errors dominate here: too much adhesive creates clumps and stickies, too little gives you poor retention. Proper pickup means a thin, even coating on the base 1-2mm of the extension. Not a blob. You should barely see the adhesive on the extension before you apply it.
Placement matters just as much. The adhesive should sit 0.5-1mm from the eyelid, never touching the skin. If your client feels the extension when you press gently on their eyelid after application, you've placed it too close.
Why a $15 tweezer in skilled hands beats a $150 tweezer in shaky ones

Expensive tools help. But only after you've developed the control to use them properly. A $150 tweezer won't stop your hand from shaking or improve your isolation if you haven't built the foundational skills yet.
Steady, controlled hand movements matter more than tweezer price. This doesn't mean cheap tools are ideal. It means skill comes first, tools second. Once you can isolate cleanly and apply precisely with basic equipment, upgrading your tools will genuinely improve your speed and comfort. Before that point, you're just spending money on equipment you can't fully utilise.
The isolation test: 30 seconds that reveals your real skill level
Here's the test: isolate a single natural lash and hold it steady for 30 seconds. No hand shaking. No lash slipping. If you can't do this comfortably, you can't apply extensions with the precision clients deserve.
This reveals whether your hand control is actually ready for paid work. Spend 10 minutes daily isolating lashes on a mannequin head, holding each for 30 seconds. It's boring. It works. You should be able to pass this test consistently before taking money from clients.
Attachment point precision: the 1mm difference between retention and fallout
The ideal attachment point sits 0.5-1mm from the eyelid, on the natural lash shaft. Place it too close and the extension hits the eyelid, causing discomfort and premature shedding. Place it too far up the lash and retention suffers as the natural lash grows out.
After application, gently press the client's eyelid. They shouldn't feel anything. If they do, your placement is too close. This 1mm difference determines whether your client books again or finds another technician.
How to build technique that makes any product work better

Identifying problems is easier than fixing them. Technique development requires consistent, focused practice, not just more clients. You need deliberate training that isolates specific skills and builds them systematically.
The following practice plan works. It's not exciting, but it builds the hand control and precision that separate competent technicians from struggling ones.
Practice on mannequin heads until your hand stops shaking
Mannequin practice lets you focus purely on hand stability and precision without worrying about client comfort. Spend 30 minutes daily on isolation hold time and steady hand positioning. When you can isolate and apply 20 extensions in a row without hand tremors, you're ready for more client work.
Film your practice sessions. You'll spot shaky moments you don't feel in real-time. The camera doesn't lie about hand stability.
Film yourself working and watch for these three technical errors
Set up your phone on a tripod at eye level, capturing your hand movements and the lash line. Watch for three specific errors: hand shaking during isolation, inconsistent attachment points, and rushing the adhesive dip.
Watch the footage at normal speed first, then slow it down to catch subtle mistakes. Do this weekly. You'll track improvement and catch bad habits before they become permanent. Understanding common misconceptions in lash application, like those covered in Dont Get Them Wet The Trainer Said Fact Or Fiction, can also help you identify where technique assumptions might be holding you back.
Master one adhesive completely before switching brands
Each adhesive has different dry time, viscosity, and working properties. Brand-hopping prevents you from developing the muscle memory and timing that comes with deep familiarity.
Mastery means you know exactly how much to pick up, how long you have to work, and how the adhesive behaves in different humidity. Stick with one adhesive for at least 50 full sets before considering a switch. Consistency in learning matters more than finding the "perfect" product.
Your technique is the product
Remember the student with the $450 kit who didn't get results? The problem was never the products. It was the expectation that products could replace skill development.
Clients pay for what your hands can do, not what brand names sit in your kit. If you can isolate cleanly, choose appropriate extension weight, and place adhesive precisely, you'll deliver excellent results with mid-range products. If you can't do those things, premium products won't save you.
Invest practice time before investing in expensive supplies. Build the foundational skills that make any reasonable product perform well. Quality products complement good technique, but they can't replace it. Your hands are the tool that matters most.


Leave a comment
This site is protected by hCaptcha and the hCaptcha Privacy Policy and Terms of Service apply.